Enabling Virtualization
What is virtualization and why enable it?
Virtualization lets you run different operating systems on your device, like Android. For example, ZennoDroid uses this virtual environment for better performance with the emulator. We strongly recommend enabling virtualization because you'll get much better performance when working with emulated devices.
Here's how to check if virtualization is already enabled.
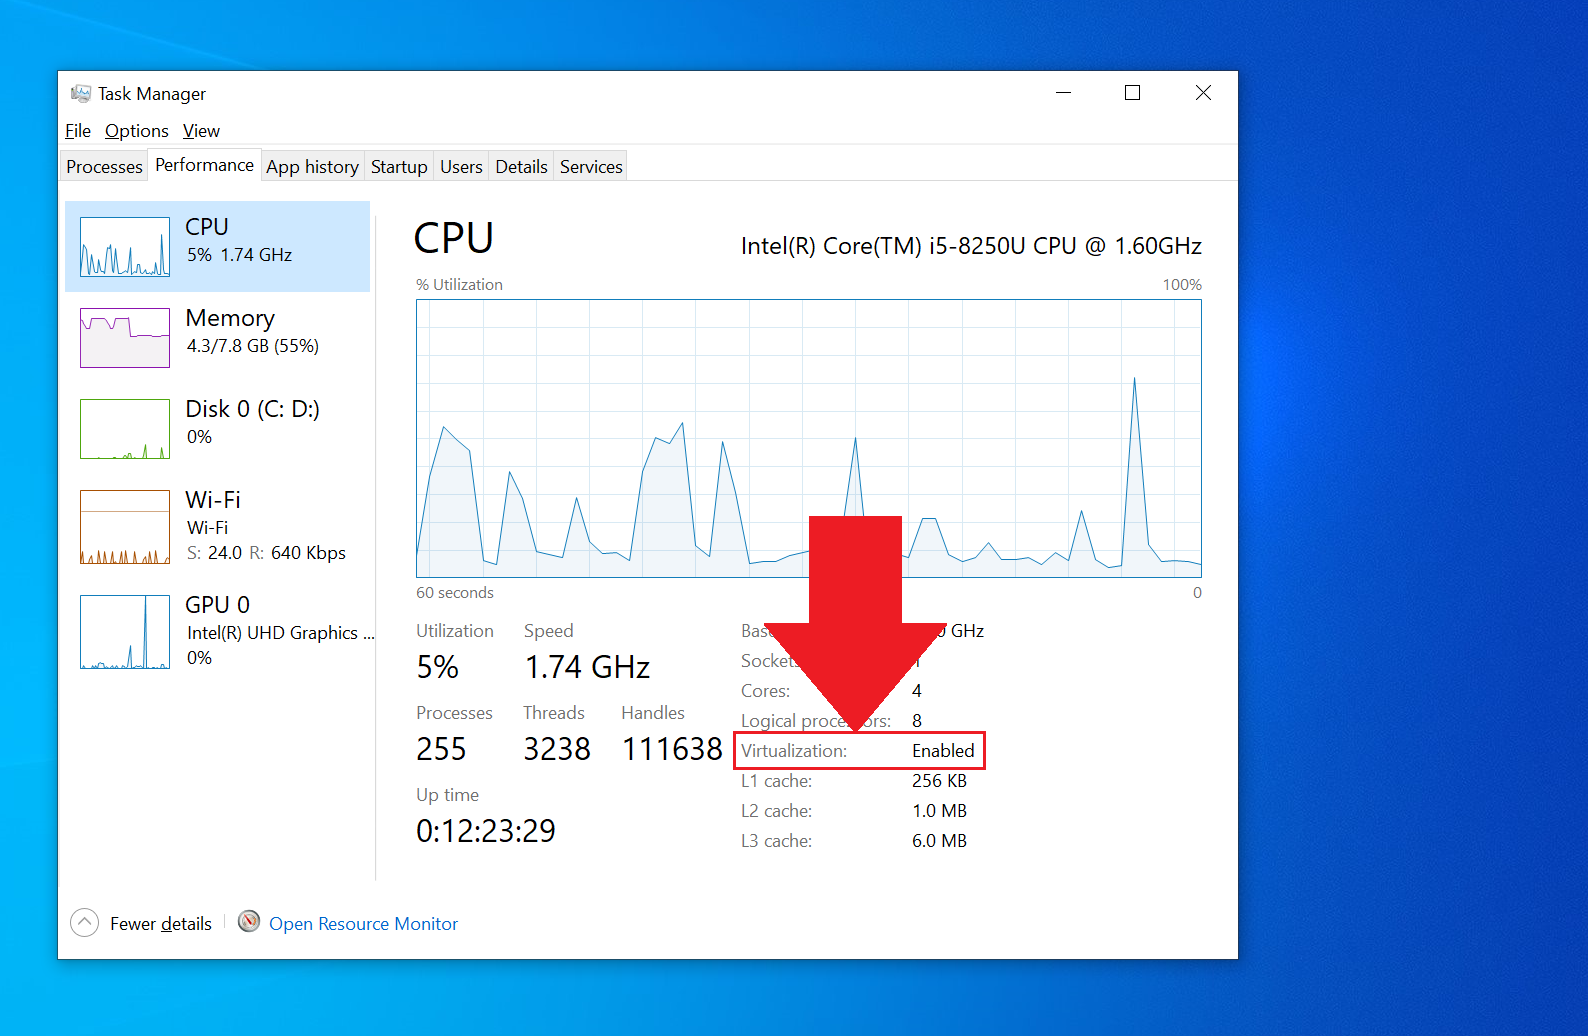
Let's check if virtualization is available.
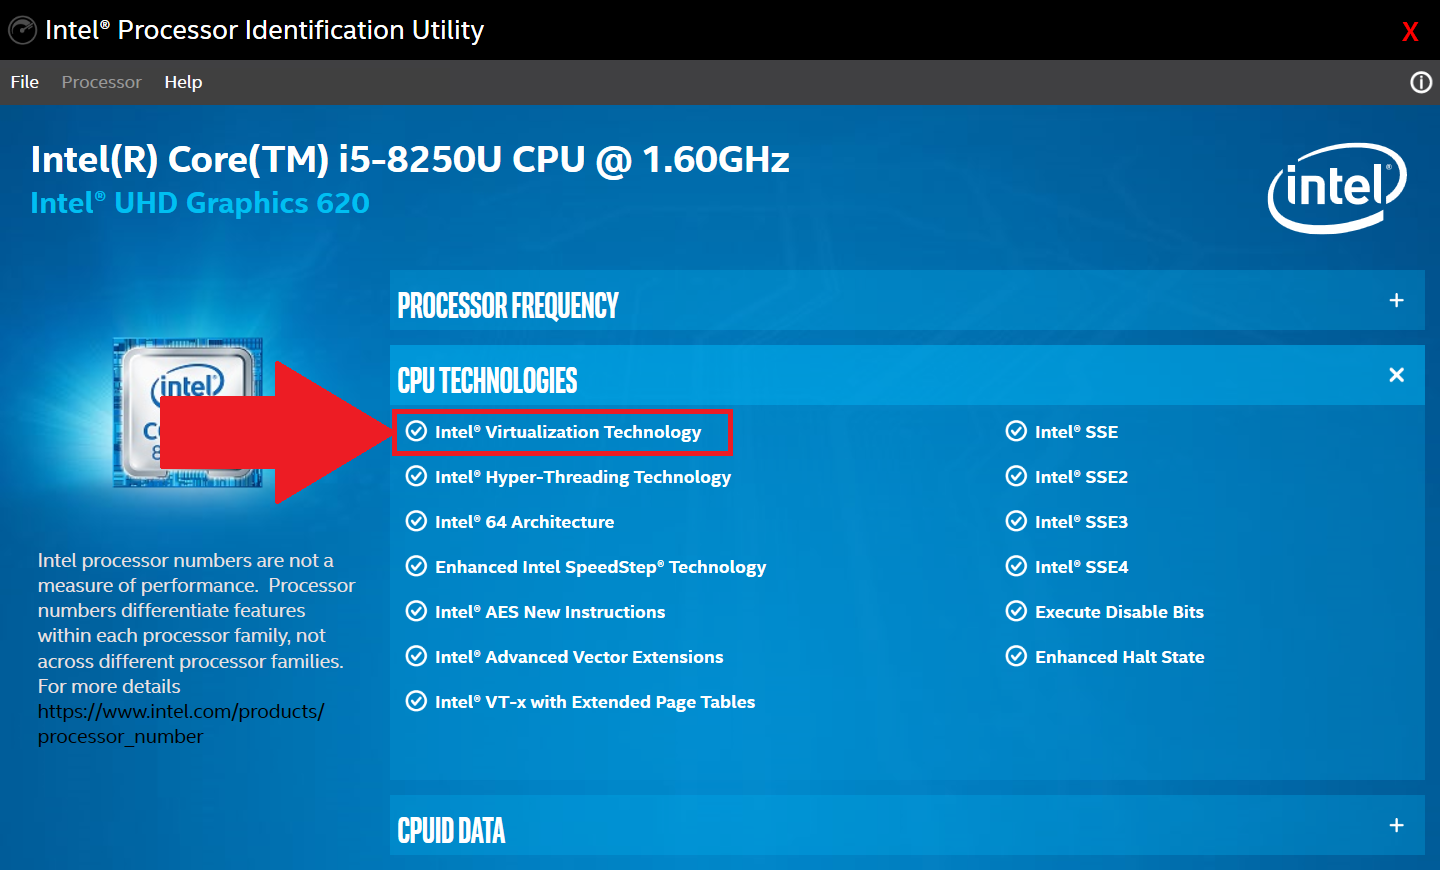
Computers with Intel CPUs
Download and install the Intel Processor Identification Utility, then go to the CPU Technologies tab. If there's a checkmark next to
Intel® Virtualization Technology, it means you can enable virtualization.
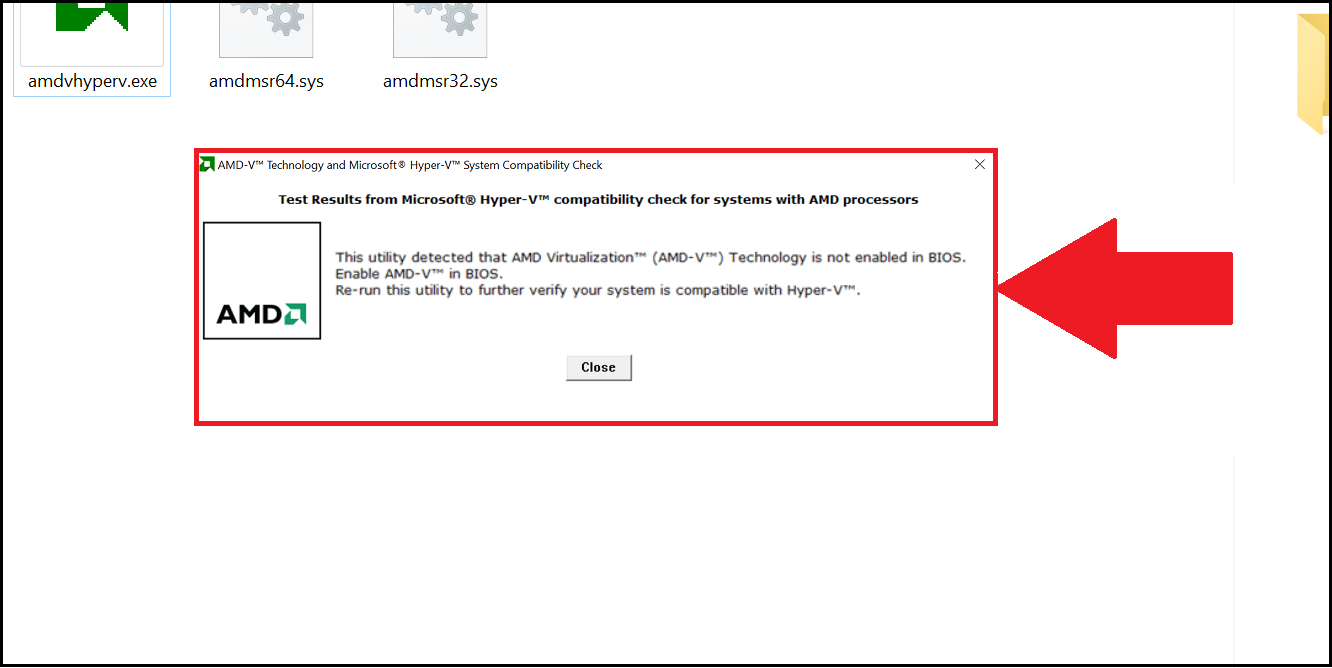
Computers with AMD CPUs
Download the AMD-V Detection Utility and extract the files. Run the .exe as administrator. The program will tell you if virtualization is available on your device.
How to enter the BIOS?
- Go to the Start menu and open Windows Settings.
- Click Windows Update, then choose Recovery, and then Restart now.
- Pick Troubleshoot and Advanced options.
- Choose UEFI Firmware settings and click Restart now.
You can also enter BIOS by pressing the designated access key while your computer boots up:
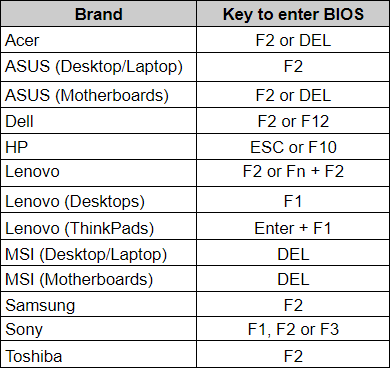
We've listed the most popular manufacturers for your convenience in the table. If you don't see yours here, we recommend checking your device's user manual.
Enabling virtualization
Intel CPU

- Press F7 or go to Advanced Mode.
- Choose CPU Configuration.
- Go to Intel Virtualization Technology and change the setting from Disabled to Enabled.
- Press Exit and select Save changes & reset to turn on virtualization.
AMD CPU
- Press F7 or go to Advanced Mode.
- Choose CPU Configuration.
- Find SVM Mode and select Enabled from the drop-down menu.
- Finally, hit Exit and then OK to apply the settings.